
It is best to read these lessons after you have read the Getting Started guides.
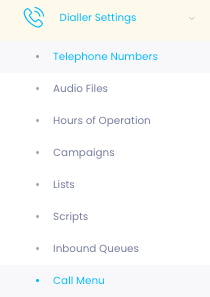
This Lesson looks at setting up Telephone Numbers & Queues in depth.
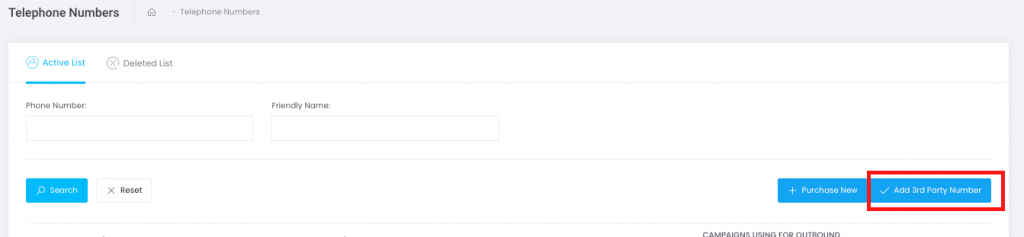
Firstly, lets navigate to the Telephone Numbers page
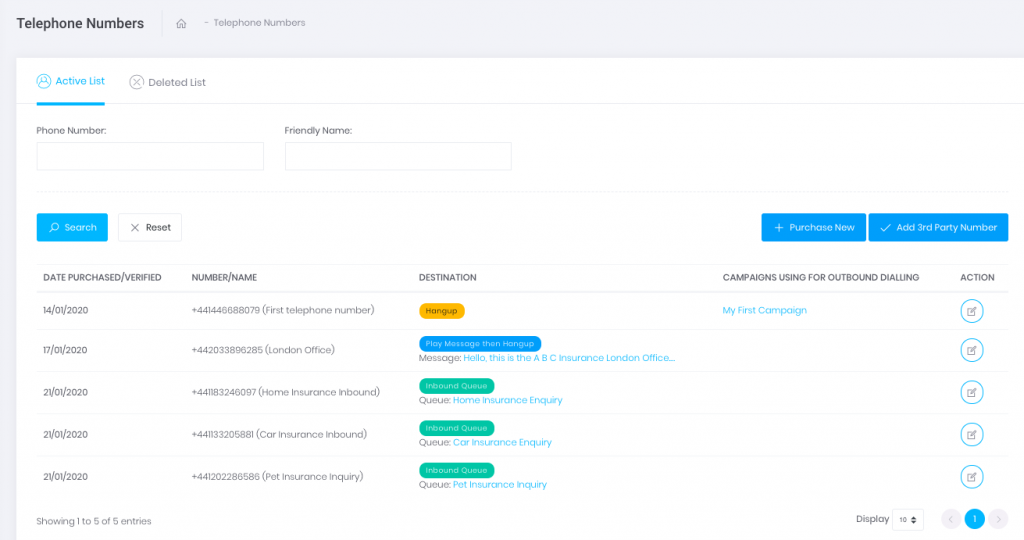
Here you can see all Telephone Numbers in the system, their name, the destination, and what campaigns are using this telephone number to call customers
At any point you can edit the telephone number and change the destination.
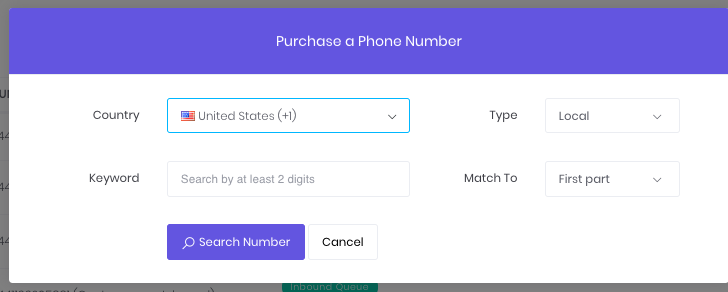
Buying a Telephone Number
Lets walk through buying a telephone number. Click on Purchase New, and select your country.

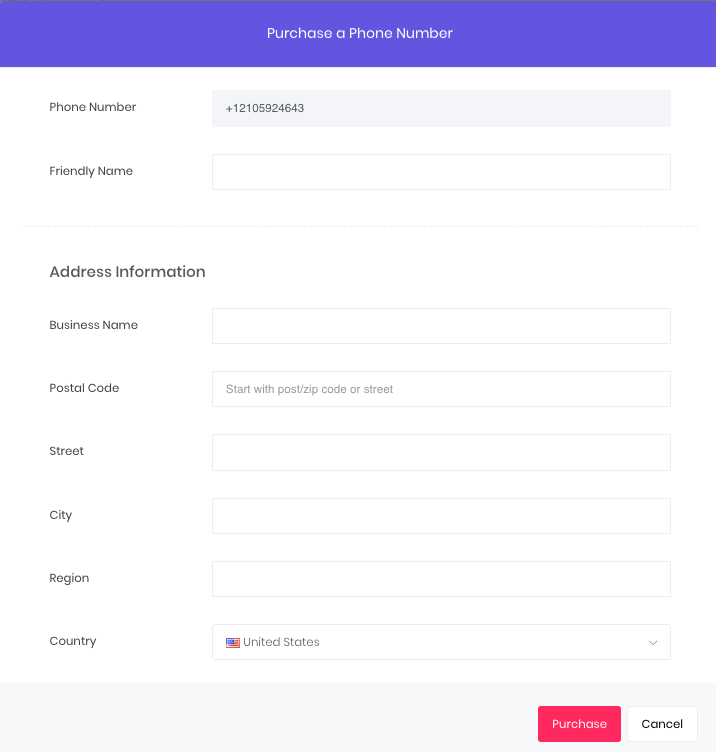
Once you have selected which number you wish to purchase, you will be prompted to fill in your address details
Add Third Party Number
Topadial also allows you to use third party numbers.
By Clicking “Add 3rd Party Number”
Enter your telephone number
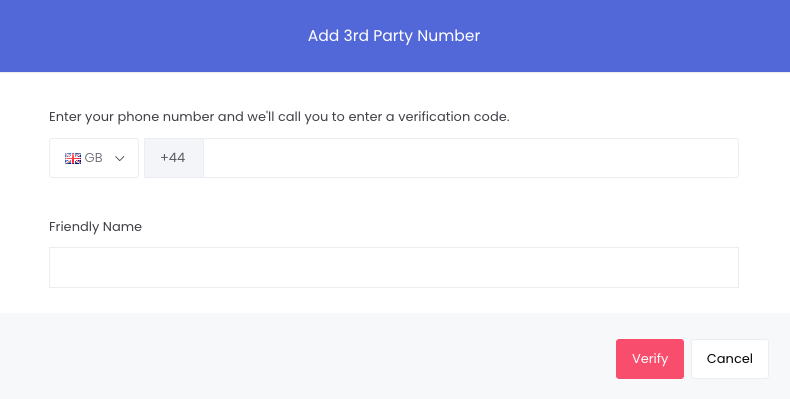
Enter your number and click “Verify”
A call will be made to the number and you can enter the code given to you.
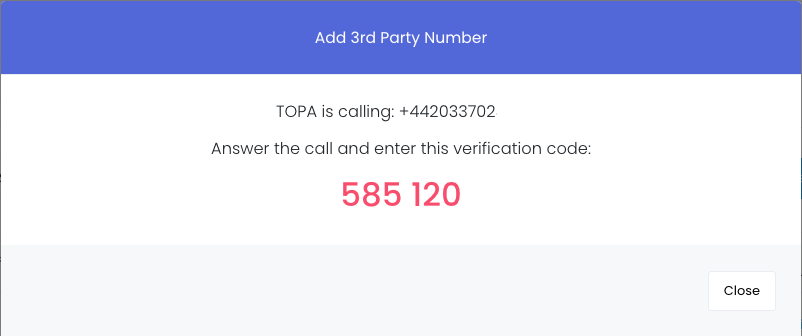
Once you enter the code into the telephone call, your number will be verified.
Please note, this will allow you to make calls FROM the number, but where calls go TO is still controlled by where you bought the telephone number.
Telephone Number Destination
Once you click purchase, you will be able to setup the number, and the destination. You can also edit your telephone numbers at any time to edit the destination.
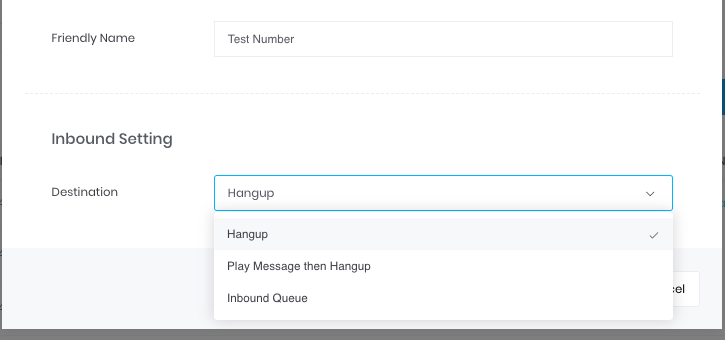 You can select the destination, to either Hangup, Play Message Then Hangup, or to a inbound queue. Depending on your local laws, you may want to Play a message such as “You have been called today by Company XYZ, we will contact you again soon” if you do not want to receive inbound calls to the number.
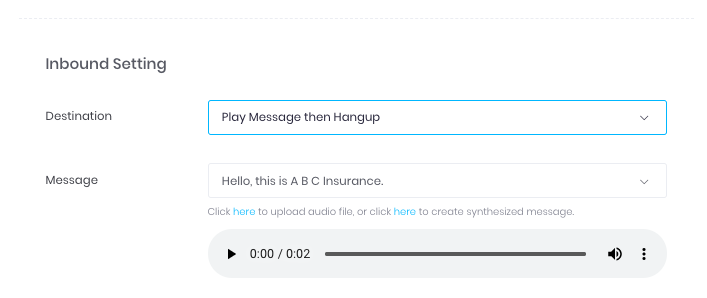
It’s very easy to upload audio files as a message, or create synthesized messages.
Using a Telephone Number in a Campaign
We will talk about campaign setup more in further lessons, but for the purposes of discussing telephone numbers, you can select which telephone number your campaign dials from (the number which customers will see) in the campaign settings.

Setting Up A Queue
We can create inbound call queues very easily in Topa Dial.
Here you can see all of the queues in the system, and which telephone numbers point to them
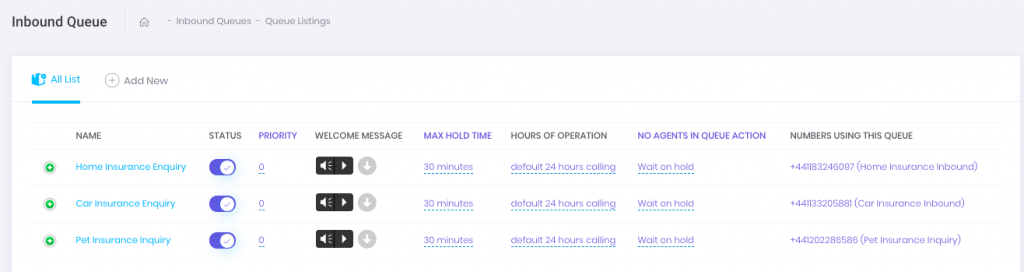
Lets practice starting a new queue, by click the Add New button
Once you have named your queue, it will expand the queue options so you can edit it. You can also click the green + icon next to your queues to edit them at any time.
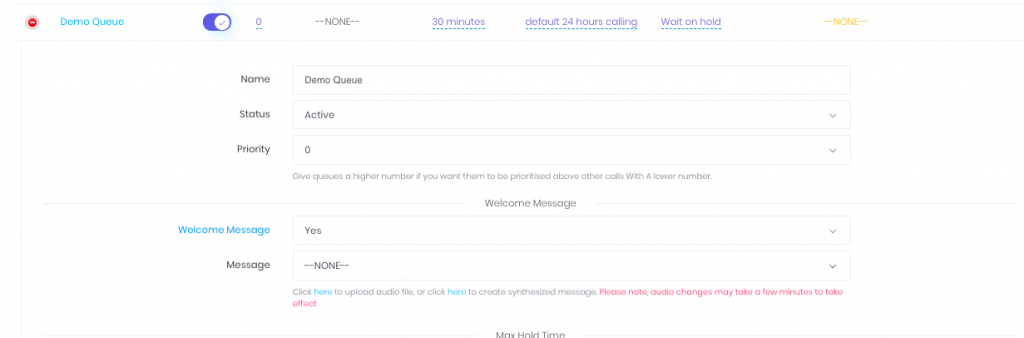
Here you can see the Name of the queue, the Status, and the priority
Lets explain priority… Lets see agent A is logged into a campaign and has selected 3 queues to receive calls from, and there is 3 customers waiting, 1 customer on the 3 different queues, which customer will go to the Agent when they are available is decided by the priority. The customer on the queue with the highest priority setting will connect to the agent first. The queue with the highest priority number will connect the customer to the agent first.
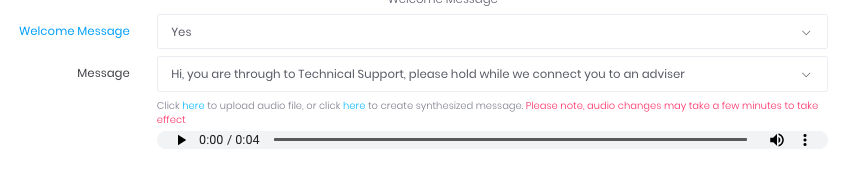
Welcome Message
Each queue can have a welcome message, this is a message which is played to every customer when they connect. Here we can select if we want this activated, and upload a audio file as a welcome message, or synthesize a message.
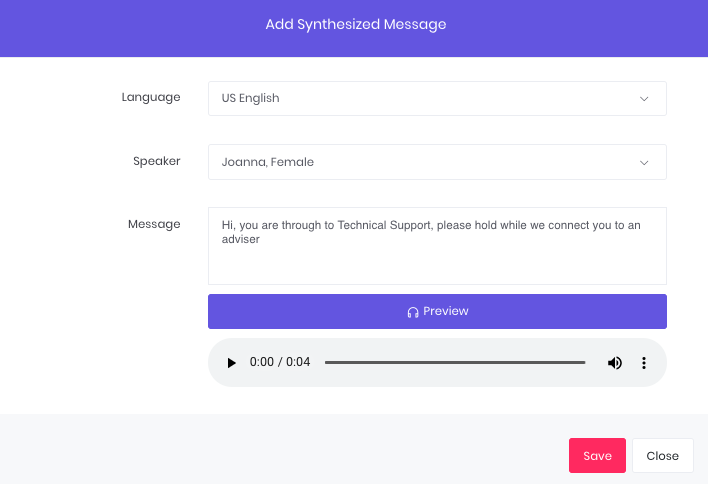
Here we have created a Synthesized message by clicking “click here to create synthesized message”, you can select from many accents and speakers then type in your language. Once you have a message, click preview to create the file, then save.
Max Hold Time & Hold Music
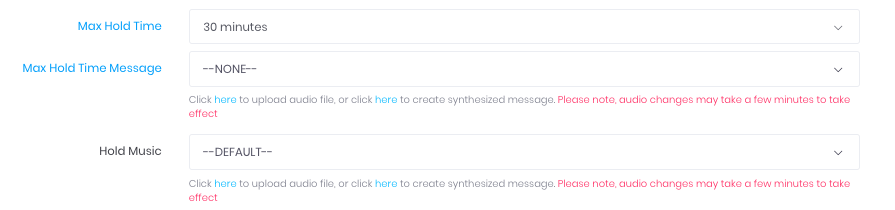
Here we have the Max Hold Time settings. If you do not want your customers to wait for too long, you can set it here, and the message they will receive before the call is terminated. This is a useful option if you call customers back, for example you may set a 10 minute wait time and a message saying “Sorry its took so long, we are really busy and will call you back.” Here you can upload a message, or synthesize one.
Here you can also upload custom Hold Music for the queue.
Hours Of Operation

Here you can set your hours of operation, this is important as otherwise customers could wait on hold with nobody available to take their call. Select your hours of operation from our standard templates or create new hours by clicking Click Here to add new call times.
You then need to upload or create a out of hours message such as “Sorry, please call back between the hours of 9 and 5”
No Agents In Queue Action

This is an important setting. It decides what to do with a customer when there are no agents logged into a queue to take their calls. You can set it to “no queueing” which will not allow a customer to join the queue, and play them a message such as “Sorry all of our agents are busy at the moment, please call back.”
Or you can set it to “Wait On Hold”, but the risk of this is there maybe no agents logged in to take the call, and the customer will wait sometime on hold. For example, if all of your agents go on lunch at the same time, in a small office, this could lead to customers waiting until the max hold time. This setting can work fine, if you ensure somebody is looking at the wallboard to see any customers waiting, and logs into the campaign to take the call.
Please note, this No Agents In Queue Action is applicable only within office hours, so if you have your out of hours set to 9 – 5 and a customer calls after 5, they will hear your out of hours message, as opposed to the No Agents in Queue Action
Once you have selected all of your options, and saved, you can point your telephone numbers destination to your queue.
Setting up a Call Menu
You can also send your calls to Call Menus or “IVR’s”, where customers can press 1, press 2 etc for different options.
Firstly, navigate to the Call Menu Option.
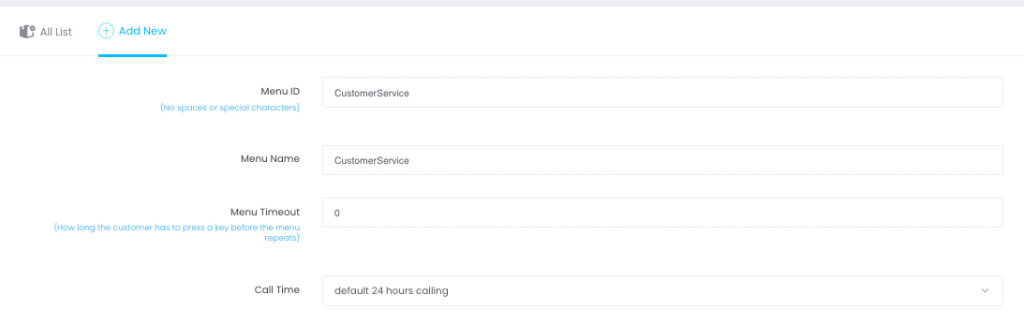
Menu Id and Name – Click on Add New, give your menu a Menu ID and Menu Name.
Menu Timeout – (how long the customer has to press a key before the menu repeats)
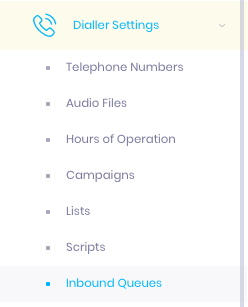
Call Time – Select the Call Time the Menu will be active. You can setup a different Call Time by going to Dialler Settings > Hours of Operation
Click Save
Edit Call Menu
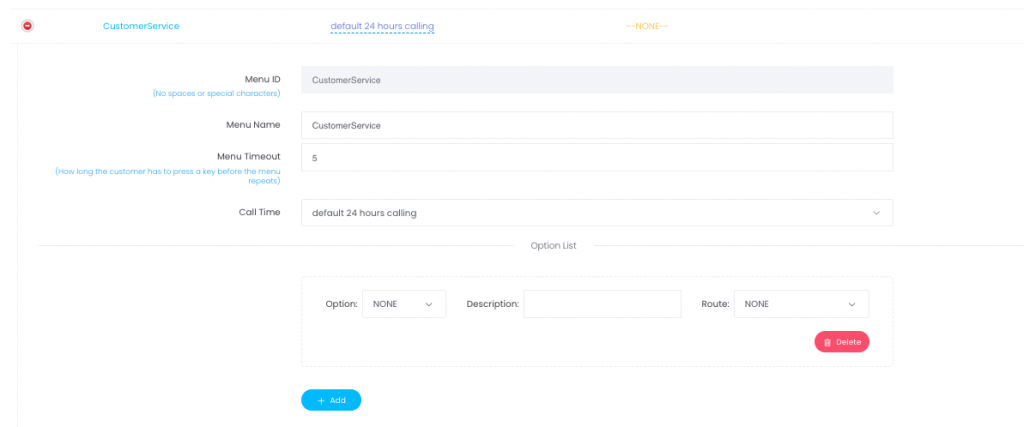
Once your call menu is saved, it will appear in the list of Call Menus
To add a new Key Press Option, click on “Add”
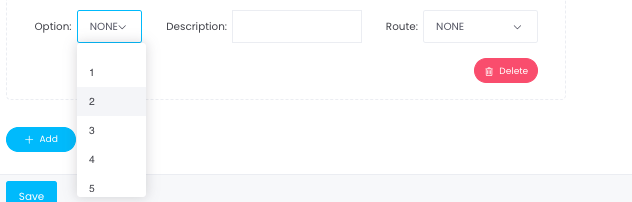
Here we can add which Key we want to add, the description, and the Route
Call Menu Route

Here we have set the Call Menu Route “Customer Service” – So if a customer presses 1, they get directed to the Call Menu Customer Service.