
It is best to read these lessons after you have read the Getting Started guides. Particularly, Understand Outbound Dialling
This lesson explains in more detail how to create a campaign, campaign settings & scripts.
What is a Campaign?
Agents need to log into a “campaign”, campaigns can dial multiple lists. For outbound dialling, your campaigns are generally used to split up which group of lists/leads agents dial.
For example, an insurance broker may have a life insurance team and a home insurance team. You don’t want your life Insurance agents ringing customers who are interested only in home insurance.
So you would setup a life insurance campaign and a home insurance campaign, assigning the life insurance lists/leads to that campaign, and the home insurance lists/leads to the home insurance campaign.
Another use maybe you may have a “Web Leads” campaign where you assign your web leads lists, and the agents you want to dial those web leads log into this campaign. And you may have a separate campaign for “Cheap Leads” where you put your agents who are just training on there to call the cheap leads.
So basically, campaigns are a way of segmenting which lists/leads are called. Reports can also be ran per campaign, so there is several reasons why you would run multiple campaigns.
Lets Navigate to Campaign View
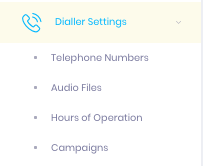

Here we can see all campaigns we have, whether they are active, the dial method, dial level, agent details and dialable leads
The icons on the right allow us to copy a campaign, edit the campaign, or delete the campaign.
This first campaign setup in your Topa Dial is a useful template for other campaigns, when starting a new campaign, its useful to just Copy this campaign.
Campaign Settings
Now, we will go through every campaign setting in detail, and practice creating a new campaign from scratch to aid thorough understanding.
Firstly, we will click add campaign from the campaign view page.
We are asked for basic info about the campaign
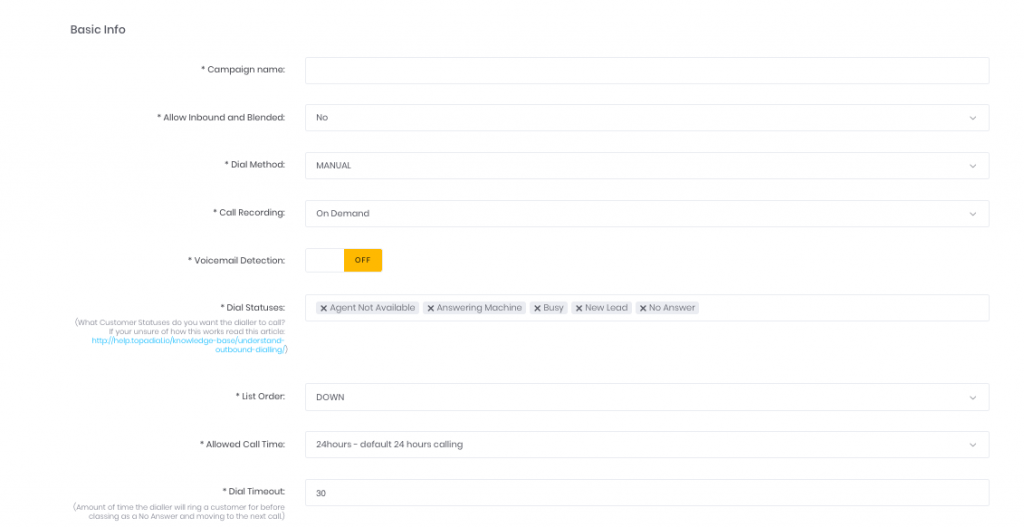
Campaign Name – This is self explanatory, but its worth noting try and stay organised with names of campaigns, lists etc, good dialer management gets more productivity and sales, and dialer management is a skill in itself
Allow Inbound and Blended – This is a option to let the agents take inbound calls from queues & make outbound calls. No means you can only make outbound calls
Dial Method – This is the method of dialling the campaign will use. There is 4 methods available
Manual – This is where agents click a button to dial the next lead. You can still upload a list of leads, but the agent triggers the next call.
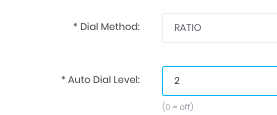
Ratio – This is the most popular method, this is where the dialer makes X calls per agent based on the ratio set. For example, ratio 3 will make 9 calls when there is 3 agents available to take calls. Of course, sometimes more than 3 out of the 9 calls will answer the phone, and this is where we get a “dropped” call where the call will not be able to connect to a agent, and will disconnect. Play with the ratio to compromise between keeping your agents as busy and productive as possible, without dropping too many calls. This method will prompt you to enter the ratio.
Predictive – This is a method where the dialer uses a advanced algorithm to keep the agents as busy as possible, without exceeding your maximum drop rate. You select the drop rate you find acceptable, and the dialer will stay around that % set as the drop rate
Call Recording – Call recording has the options No Recording, Record all Calls or On Demand. With on Demand, the agent can click the call recording button to start or stop the recording. This is useful to record only certain parts of sales, and omit others such as sensitive data.
Note that this setting can result in multiple recordings per call. See here how to find these recordings.
Voicemail Detection – Voicemail detection applies to the automated dialing methods, Ratio & Predictive, with these dial settings and Voicemail Detection, the agent will only be connected to “human answers.” The voicemail detection uses a human detection algorithm which decides if the audio its connected to is human or a answering machine. With all things like this (try talking to your siri/alexa/google home), its not 100% perfect, but it hugely increases agent productivity.
Dial Statuses – If you do not fully understand dial statuses, please read the very informative Understand Outbound Dialling help guide.
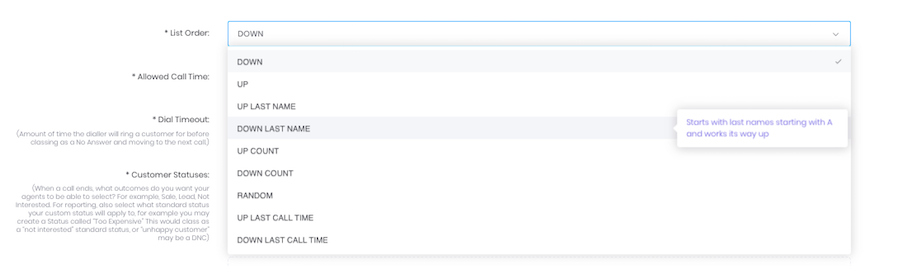
List Order – This is the order in which you want the list of leads to be dialled. The most popular options are Random which speaks for itself, and Down Count, which will always dial the least called leads first e.g. NEW leads.
For the full list order options and explanations, hover over each option in the dropdown menu
Allowed Call Time – This is the times which the campaign can make calls. It applies to the CUSTOMERS home time zone. So it is important for example in the USA, where there is a large time difference between zones. If you set your call times from 9am – 9pm it will not allow you to call a customer in their home zone outside the hours set.
Dial Timeout – This is the amount of time the dialer will call customers before hanging up the call. 30 seconds is a good amount of time to wait for the customer to answer.
Customer Statuses – If you do not fully understand dial statuses, please read the very informative Understand Outbound Dialling help guide.
Lists & DNC
The next step when creating a new campaign, is lists & dnc.

Lists – Here you can select which lists you want to dial, of course you can always edit it later.
Do Not Call List – We have 2 options for DNC management.
Dialler Wide DNC List – If we select this option, any customers which your agents select as DNC will be added to your “Dialler wide DNC list”. This means any other campaign which is using the Dialler Wide DNC list wont be able to call this customer again.
It also means this campaign wont be able to dial any customers which are in the dialler wide DNC list, even if they were added to the list on another campaign.
Campaign DNC List – If we select this option, any customers which your agents select as DNC will be added to your campaign DNC list. This is specific to this campaign. This option is useful for when you sell more than 1 product or run multiple entirely different campaigns.
E.g. If you ring a customer to sell them Car Insurance, and they request to be put on the DNC list, you don’t necessarily want to add them to the Dialler Wide DNC list which wont allow them to ever be called again on any campaign.
Here you can also manually add or upload a csv file containing your DNC’s to ensure the campaign gets off to a good start. Or you can do this later.
Outbound Caller Id / Telephone Number

Here, you can select the Outbound Caller Id customers see when you call them.
You can also see where this number forwards to, you can see here it forwards to “My First Queue”
You can purchase new telephone numbers, or use third party numbers. For more information on telephone number and queue setup, checkout Lesson 1 – Telephone Numbers & Queues
Pause Codes, Extra Field Names, Preprogrammed Transfer Numbers, Scripts
We are nearly there! Just the final steps to cover.
Pause Codes – These are the codes your agents can select which feeds into their Agent Performance Report, e.g. if they Select the “Admin” Pause code we can see what % of their day was spent in this pause option.
As default topa dial has the below paused codes you can edit or add to:

Extra Field Names – In Topadial we can add extra fields for the agent to fill in when speaking to the customer. We simply add them. For example a Loan provider might want to add the Custom Field “Loan Amount”

Preprogrammed Transfer Numbers
Often, campaigns require to transfer calls to external numbers, and sometimes this goes wrong with agents entering the number incorrectly. Here we can add a number already for the agent to select.

Scripts
Here you can select a call script to attach to the campaign. This is what your agents will see when they get a call, so they have a script to follow. Scripts can be dynamically populated with the customers name etc. Checkout this help guide for more info Scripts
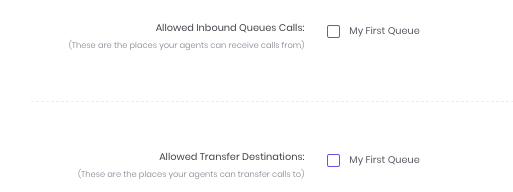
Allowed Transfer Destinations & Inbound Queues
Here you can select which inbound queues your agents in this campaign can receive calls from. And which queues they can transfer to. As default, they can transfer to other agents & external numbers.
When creating a new campaign, the final set is Management Alerts, instead of covering that here, please refer to the Management Alerts/Gamification Lesson